Personalised Christmas Cards 2017

Tuesday 19 December 2017

It's Snowtime aperture Card Tutorial


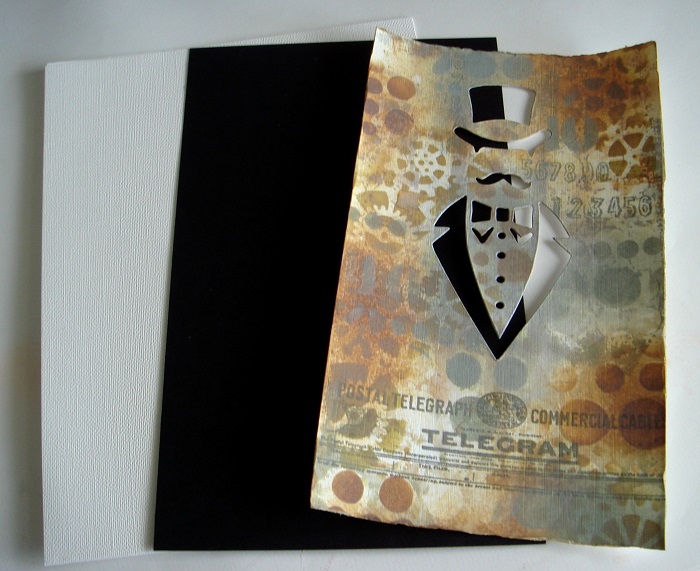
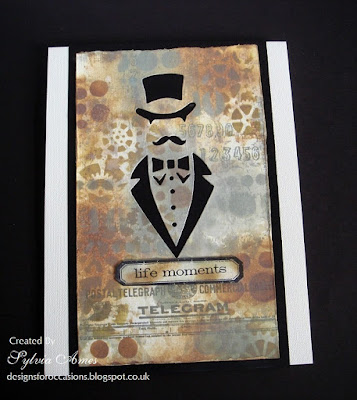
This is my last blog post for 2017 and I would like to wish friends, followers and family a very Happy Christmas.   This is also my last papermilldirect DT blog post for the year and you can find a tutorial for making this peek-a-boo card HERE.


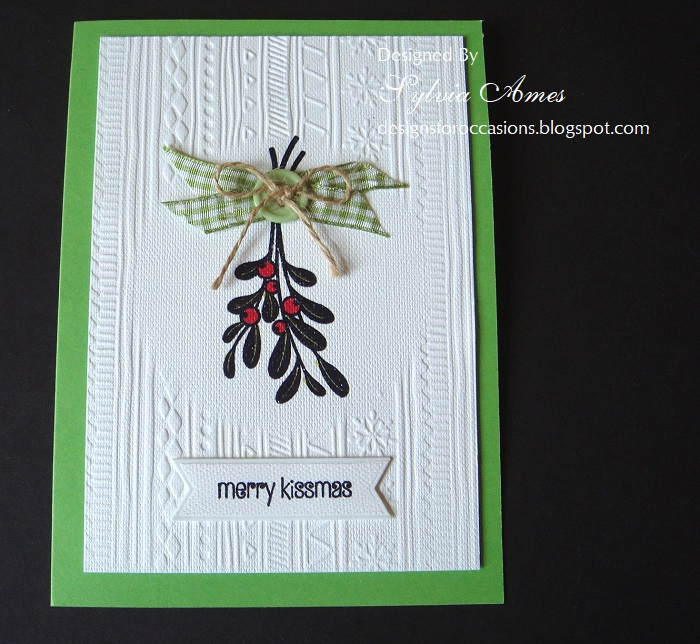
Looking through my Christmas stamps I found a Woodware snowman stamp which was bought last year.   Being a large stamp it didn't get used but a quick re-think this year and I came up with an A4 top fold card which enabled me to fit all the stamp across the card.  I also made a square card using just a small area of the stamp.


Materials used:
  • Papermilldirect white linen 250gsm, white hemp 255gsm, Christmas red 240gsm and buff card 240gsm
  • Woodware stamp "Jolly Snowmen", sentiment from Crafter's Companion and A Stamp In The Hand Co. stamp "Field of Sky"
  • Crafter's Companion Spectrum Noir pens
  • shaped dies
  • Glitter and bakers twine


See you all in the New Year, have a great Christmas everyone.

Wednesday 13 December 2017

Robin Gift Box And Matching Card


Hello friends, followers and passers by.  How is your Christmas crafting coming along? I have finished my cards and put them in the post today.  It's been a very busy few weeks and I am now on top of my Christmas preparations.

Today I have my papermilldirect DT make, a gift box to hold a Christmas bauble and a matching card.  


The gift box is a Silhouette cutting file by Daniela Moscone.  I used papermilldirect buff and Christmas red card.  The box was cut out and stamped with snowflakes before assembling.  The robin and holly were edged with a little distress ink before fastening to the box lid.


To make the card I reduced the robin and holly cutting file in Silhouette Studio and cut them out. I stamped snowflakes onto a red die cut circle and layered this onto a slightly larger buff circle, the robin and holly were attached  and then attached to a red card blank.  The card was finished with a Christmas sentiment. 

Saturday 2 December 2017

Ho-Ho-Ho Gift Bag and Matching Card


Anoth blog post from me today, a fun Christmas gift bag.  Who wouldn't love a present from Santa in this jolly red, white and black creation?

The bag and card were made with Papermilldirect Christmas red, white, black and silver card.  The gift bag was cut out on the Silouhette Cameo using a Lori Whitlock cutting file and  I took the wording and other elements from the bag to make a card to go with the bag.


I do love making matching cards to go with my gift bags.  To make the card I reduced the size of the words and belt in Silhouette Studio, cut them out attached them to a red square, layered it onto a larger white square then onto a square red card blank.  

Sylv xx


Grey, White With Snowflakes Christmas Greetings


Hi everyone, today I have a few Christmas cards for my Papermilldirect DT post.  I have been busy over the last few week working on my 2017 Christmas card designs, there are a few colour combinations I wanted to try this year and grey and white is one of them.  I like the contemporary feel of the grey and white with the stamped snowflakes and white/grey layering.


Snowflakes were stamped in white and grey pigment inks on smooth grey card,  sequins, white domes, die cuts, tags and stamped sentiments were added to embellish the cards.  


I used Papermilldirect card slate grey smooth card 240gsm and white linen 255gsm mirri holographic blast 220gsm, larger snowflake stamp by Personal Impressions, smaller flakes freebie from magazine, picket fence distress ink and Oak House Studio grey pigment ink and Crafters Companion sentiment stamps. The dies used were a freebie from a magazine, Poppystamps tree die, Hero Arts Believe, Sizzix tag dies.

I hope your Christmas preparations are going well, I have my cards written and a few gifts bought and looking forward to a lovely family Christmas.

Tuesday 21 November 2017

Quick Batch Make Poinsettia Watercolour Effect Cards


Good evening friends, followers and family.  This evening I have my weekly DT post for Papermilldirect, a quick easy way to batch make Christmas cards using poinsettia watercolour effect panels to add to a card blank.  I make lots of individually designed cards at Christmas but also make batches of cards to boost my stash of Christmas cards. 

Materials I used:
  • Papermilldirect smooth white 250gsm, white hemp 255gsm and Christmas red 240gsm card
  • Stampers Anonymous Tim Holtz mini layering stencil set #19
  •  Ranger distress inks festive berries, cracked pistachio, bundled sage and tumbled glass
  • Archival ink black and Momento ink London fog
  • Taylored Impressions banner die
  • Hero Arts sentiment stamps
  • Ranger liquid pearls

Simply stencil your largest image (poinsettia), add some colour in patches leaving some white card showing, then stencil a smaller image over (holly branch).


Stamp a sentiment or add one stamped on a banner or tag.  Layer your stencilled art onto a slightly larger piece of Christmas red card, then mat onto the white card blank.  Add some Perfect Pearl dots to the center of the poinsettias to finish your card.


Pop over to the Papermilldirect blog for more details on my DT blog post.  Also check out their new range of card blanks, now available in all the 240gsm card colours and five sizes to choose from.

More Christmas makes to blog next week see you then.

Saturday 18 November 2017

Milk Carton Advent Calender


Hello followers, friends and family.  It's time to get making those Advent calenders for the children before December is here.  I make one every year so the grandchildren can open doors or boxes when they come to call. 


I have been working on my Advent calendar this week, a blue and white theme with snowflakes.  it is made up of 25 small milk carton boxes and a base to hold them.  The milk carton boxes are great for holding 4 or 5 treats, ideal for a group of children or grandchildren to open and enjoy each day.


The boxes and base were cut on the Silhouette Cameo with a Lori Whitlock cutting file using Papermilldirect white linen and marine blue card, a lovely combination and a change from the traditional Christmas colours.


Each box was stamped with Stampers Anonymous snowflake stamps and heat embossed.  The boxes were assembled, filled with chocolates, and a date tag fastened to each box with a contrasting ribbon.

How is your Christmas crafting coming along? I have lots of Christmas makes to show you over the next few weeks, my Christmas crafting is nearly done just a few more cards to make.  back soon.

Sylv xx

Friday 10 November 2017

Triangle Star Fold Christmas Card


Good evening, friends, followers and passers by.  I have been working on my Christmas crafts recently and made this star card and tree decoration.  You can find full details and a tutorial in my DT monthly post over on the Papermilldirect blog.
 

The star card was made from a 12" x 12" sheet of card and the smaller version to use as a tree decoration using A4 card.

I printed patterned paper onto white linen paper using a digital download from The Lovely Studio and used this and snowflake die cuts to decorate the card and tree decoration.  A Christmas greeting was stamped inside the card.


I usually make small tree decorations each year to hold treats for my grandchildren, the star is ideal for this when reduced in size it will hold a chocolate coin.

Thank you for stopping by, and many thanks for your comments left on previous post they are much appreciated.   I will be back next week with some more Christmas crafting.

Sylv xx

Wednesday 8 November 2017

New Home And A Colourful Zebra Card For A Happy Birthday


Hello friends, followers and passers by, I have been trying to get into the swing of Christmas cards and crafts but have to keep breaking off to make birthday cards.  November is a very big month for me with lots of birthdays to celebrate, I need to spend as much time in the craft room as possible now to get my Christmas makes made.

Below is a new home card for my son and a birthday card I made for my granddaughter who loves zebras (and the colour red!).


The New Home card was made using part of a Silhouette cutting file and a lovely stamp from Inkylicious New Home.  I used Papermilldirect rich cream hemp and buff card, stamping directly on to the card blank and layering the cut out house over it.


Another Inkylicious stamp Live Life In Colour with a digital zebra print paper from The Lovely Studio and Papermilldirect white linen card, white linen paper and black cardwere used to make this card.  The patterned paper was printed onto the white linen paper  and used to line the Papermilldirect envelope too.

I have started a few Christmas card which I will be showing you later in the month.

Tuesday 31 October 2017

I'm Watching You - Halloween treat jar and tags


The end of  the month is here and I am prepared for the trick or treaters who may call tonight, I have two jars filled with spooky treats and two Halloween tags.


I love making tags and these two were fun to make using distress inks, Halloween stamps and dies, and Papermilldirect black, apple green and mandarin orange card.


The tags were die cut, coloured with distress inks, stencilled, stamped with various Halloween stamps and decorated with die cut Halloween shapes then layered onto contrasting card.  I filled Kilner jars with sweets, trying to get the eyeballs to look outward then attached the tags with ribbon.  A nice treat for the grandchildren to share and any other callers on Halloween.


Materials used:
  • Papermilldirect black plain 250gsm, apple green plain 240gsm and mandarin plain 240gsm cardstock
  • Sizzix tim Holtz Alterations dies - Tag Collection and Trick or Treat 
  • Various Stampers Anonymous rubber stamps
  • Tim Holtz stencil Shatter
  • Ranger distress inks and distress oxides
  • Archival ink pad black
  • Kilner jar and halloween spooky treats
  • ribbon from stash 
Happy Haunting to all of you who are out with the children trick or treating tonight.

Sylv xx


Sunday 22 October 2017

Halloween Tissue and Treat Box


Another Halloween post from me today.  Two black and red boxes cut using cutting files from the Silhouette Store.


I used papermilldirect white linen 255gsm, black plain 250gsm and post box red smooth 250gsm card and cut the boxes out on the Silhouette Cameo using cutting files by Jamie Cripps and Tanya Batrak.  

I bought a square box of plain tissues and stamped a few with bats, just to make them a little more spooky.  The stamped tissues were put back into the square box of tissues and placed inside the Halloween tissue box .

Sylv xx


Thursday 19 October 2017

Have A Dapper Birthday


Hello, friends, followers and passers by.  Today I have a steampunk birthday card made for my son, using distress oxide inks, stencils, stamps and a Sizzix die.  The die was an impulse buy a long time ago and has laid unused since, this card was inspired by an article in Craft Stamper and I though the die would work well instead of a stamp. 


I used papermilldirect white linen card for the background, plain black card for layering and  white hemp for the card blank.


The background was blended with distress oxides and stencilled using Tim Holtz mini stencils, then stamped with Stampers Anonymous stamps.  The dapper die was cut out of the background and the background adhered to black card.  Stampers Anonymous simple sayings life moments was stamped, die cut and fastened to the card with sticky fixers.


The insert for the card was stencilled and a computer generated greeting added.

I love using the new distress oxides and have made another couple of similar cards for male birthdays next month.

Sylv xx

Tuesday 10 October 2017

Spooky cards For Halloween

 
I everyone, now we are into October I have started making some Halloween cards, a good time to use those spooky stamps, dies, cutting files and lovely Papermilldirect Autumn coloured cards and envelopes  I have in my craft room.

Halloween is not everyone's cup of tea but I usually make a few cards for the children, as well as some treat bags just in case anyone calls to Trick or Treat on the evening of October 31st.


Above is a card for the older children, featuring a zombie and graveyard with bats flying around a full Halloween moon.   The background was created with distress inks and the graveyard foreground was hand cut from black card with the large bat, crosses and tombstones machine cut on the Silhouette.


Orange, purple and black with fun images cut on the Silhouette were used for the not too scary cards for younger children.


Sylv xx

Tuesday 3 October 2017

How To Use Embossing Diffusers In Your Cardmaking


Hello everyone, my DT post over on the Papermilldirect blog today is a tutorial using embossing diffusers.  


I used my embossing diffusers with a Crafter's Companion  A4 embossing folder to make 4 different Christmas cards.  The white embossed panels were attached to coloured card blanks ready for making into Christmas cards.


The plain area left by the diffuser was used to stamp an image on the green card and to add a die cut sentiment to the blue card.


I used the diffuser insert to get the round embossed area for the bauble and the bottom of the red card.  The embossed area was coloured with inks, the round embossing was made into a bauble by adding a ribbon and decorating with perfect pearls.  A cute Pinkpetticoat snowman image was added to the red card with 3D sticky fixers and a sentiment stamped underneath.


All card used is from Papermilldirect, the white hopsack and white linen emboss really well.  If you want to know how to use embossing diffusers in your cardmaking my tutorial can be found HERE.

Sylv xx


Monday 25 September 2017

September Calendar Page - Autumn


Hi everyone, I have been catching up with my papermilldirect create a calendar pages recently, I love doing the calendar each year and do two or three month's pages at a time throughout the year.  We are well into September and the leaves are changing, mornings are becoming cooler and misty, Autumn is definitely here, my September page was made to reflect the season.


This year  a square template was cut out of card using a large square die for fastening over the page so the  coloured, stamped and stencilled monthly theme would be the same size on each page.  I also tried to make pages to reflect a season or monthly event, my June page below was to celebrate the Queen's birthday.


I will certainly be buying a few 2018 calenders this year to give as gifts, they make great presents, especially for the children or a crafty friend.  The 2018 papermilldirect create a calendar is now available to pre-order HERE

Tuesday 5 September 2017

How To Make An Autumn Themed Photo Album


Autumn is one of my favourite seasons with the rich array of colours you get when the leaves start to change.  September, October and November give us plenty of opportunity to make beautiful cards and crafts using the full range of Autumn colours.  Reds, yellows, oranges, greens through to rich dusky pinks, plums and purples.


My monthly DT post on the papermilldirect blog has a step by step tutorial showing how to make this colourful album and a list of the materials I used. 

It was easy to make and such fun to colour using distress inks.  The Sizzix leaf blueprint stamp and dies were brought out for this album, a large stamp with three dies, it just fills the front and the 3D leaf helps to hold the album closed.  I did add the two circles held with a brad so I can fasten cord round if my album gets too full.

You can find a selection of gorgeous autumn coloured cards in the papermilldirect shop, why not stock up on a box of mixed colours ready for your autumn crafting. 

Sylv xx